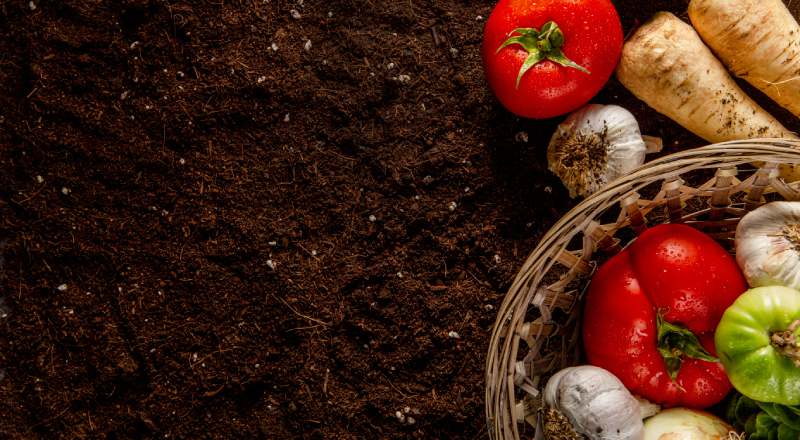
Compost is decomposed organic matter added to the soil to maximize plant growth and health. Adding compost to your garden restores the soil’s vitality and improves its water-holding capacity. Furthermore, it supports the microbes’ health, which is necessary for plant growth.
Composting happens naturally because decomposition depends totally on soil microbes and organisms. It is entirely free of cost, easy to manage, and healthy for the environment.
Many people think making compost at home is a complicated, unpleasant, messy, and time-consuming process. However, all you need is the right direction and the basic supplies from your refrigerator and kitchen to make your compost.
This blog will guide you through the clear-cut and user-friendly steps to make compost at home. So next time you’re in your kitchen, instead of discarding everything in the dustbin, you can add it to your compost to rejuvenate and nurture your garden.
6 Easy & Simple Steps to Make Homemade Compost
Making compost at home is an excellent way to save money compared to buying expensive alternatives, such as peat moss, fertilizers, vermicompost, etc. Furthermore, homemade compost transforms your kitchen waste into black gold that replenishes your garden soil with nutrients.
Follow these instructions to begin:
Pick the Right Composting Bin
Before gathering your material, you must choose a suitable compost bin that is perfect for your place and meets your preferences. There are many options for a compost bin, such as open bins and tumbler bins.
For easier access, open bins are desirable. However, tumblers are a fantastic option for quickly turning and aerating your compost pile. Some DIY options exist to create your own desirable compost bin and tumbler.
For instance, the most popular compost bin system is the 2- or 3-bin system, which is easy to create. Regardless of the compost bin type, it should be placed on a surface level with good water drainage and access.
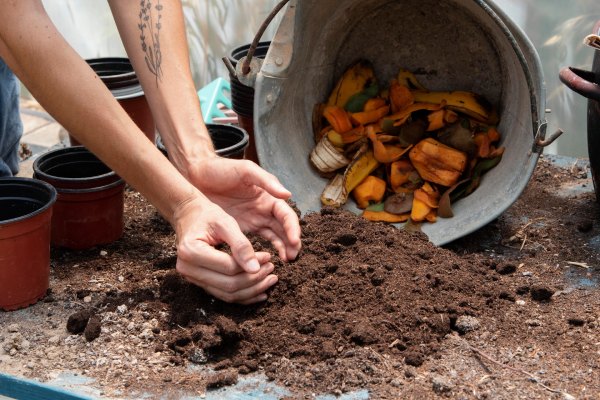
Combine 50/50 Green and Brown Materials
To create a perfect compost heap, combine the right amount of green and brown items. These are rich sources of nitrogen and carbon. The ideal nitrogen-to-carbon ratio is 50/50, so you must ensure that every brown item balances the green.
For the best results, add three parts of brown with one part of the green. At this stage, if your compost pile has a foul odor and looks too wet, add more brown materials and use a garden fork to aerate it.
If the compost heap looks browner and dryer, add more green material to moisten it. However, some people also suggest using at least one part brown and one part green.
The balanced ratio of green and brown materials is important because it allows the microbes to decompose effectively. Moreover, extra plant materials in your compost pile slow down the process and can also produce an unpleasant smell.
Tip: Before adding brown material, such as newspaper, to your compost pile, cut it into smaller pieces. Otherwise, you will ruin your compost.
Water Your Compost Pile
Water is the key ingredient in shaping your compost pile. Maintain moisture in your compost to ensure its abundant growth. Without proper moisture, your pile will take months to prepare, and if it is dry, it will not break down at all.
Conversely, if the pile is too wet, it produces a foul smell. During this time, monitor the temperature of your compost pile using a compost thermometer to ensure that materials are correctly decomposing.
According to the U.S. Environmental Protection Agency (EPA), the optimal temperature for home composting is between 90°F and 140°F. In addition to it, you can check the middle portion of your compost pile with your hand; it should feel warm.
Turn the Compost Regularly
Use a shovel or pitchfork to turn your compost regularly. Move the outer portion of the pile toward the center, continuing to do this until you see the decomposing materials.
To evenly distribute the oxygen throughout the pile, repeat the same process every two to four weeks.
Harvesting the Compost Pile
If you’re using a compost bin, harvesting the pile is quite simple. You’ll find that the compost at the bottom is ready, while the compost at the top will need more time.
Follow these steps to harvest the compost pile properly:
- Remove the lid of the compost bin and tilt or wiggle it to lose all the contents.
- Separate the layers of the pile that are ready from the ones that need more time.
- Shovel all the pile layers perfectly until you reach the ready compost.
Use the Harvested Compost in Your Garden
At this time, your compost is fully prepared to use in your garden. You can use this compost in the many different ways, such as:
Mulch: Add a 3—to 6-inch layer of compost to the soil surface. This will reduce water evaporation from the soil, keeping it moist for a longer period. Additionally, it will decrease weed growth.
Fertilizer: Sprinkle it on top of your fresh seedlings, perennials, fruits, vegetables, bulbs, trees, and a lawn.
Potting Soil: Take an equal amount of compost pile and mix it thoroughly with the vermiculite, peat moss, and sand.
Compost Tea: Gather the supplies, including non-chlorinated water, a compost pile, a bucket, and a mesh bag, to make compost tea. You can pour it directly into the soil or spray it on the leaves as a foliar.
How to Know When the Compost Is Ready?
If your compost has a dark brown, crumbly, or uniform texture, this is the first indication that your homemade compost is ready to use. It must look like a soil. However, if it has any larger pieces of materials, it’s a sign that it needs more time to break down the contents.
In addition to these signs, you can check the smell of your compost. If your compost has an earthy aroma, it’s probably ready for use.
If you’re still unsure, perform this simple test to check the maturity of your homemade compost:
Put your prepared compost in pots and plant radish seeds in it. If the maximum number of radish seeds sprout and start to grow into radishes, your compost is ready to use in your garden. However, many expert gardeners and composters prefer radishes as a sample plant because they germinate easily and quickly.
If you want to know more about best soil for indoor plants you can read this content
Benefits of Composting
There are numerous benefits of composting. Some of them are:
- Increase the soil health and the biodiversity of the microbes living in the soil.
- Retain water or moisture in the soil.
- Help in preventing soil erosion.
- Promote healthy plant growth and increase the crop yield.
- Help revitalize the poor soil and clean up the soil that is treated with pesticides and insecticides.
- Protects the environment from drought and greenhouse gas emissions.
- Boosts sustainability by turning the organic matter into black gold that promotes plant growth.
Therefore, composting at home is the best way to recycle waste materials instead of discarding them. Homemade composting is also an alternative and cost-effective option to artificial fertilizers, which contain harmful chemicals.
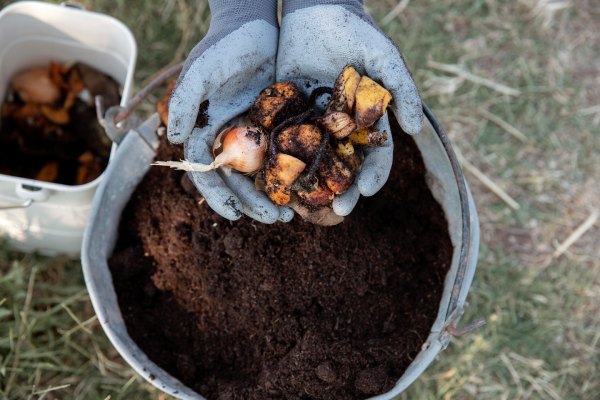
What to Put In the Compost Bin to Start?
Here is the list of materials that you can add to your compost, such as:
- Fruits, vegetables, and coffee grounds
- Leaves, flowers, and grass clippings
- Eggshells
- Cardboard
- Mushroom scraps
- Onion and garlic skins
- Potato, citrus, and banana peels
- Avocado pits
- Jams and jellies
- Fruit scraps
- Dehydrated, frozen, or canned fruits
- Tea leaves and paper tea bags
- Cooked vegetables that have gone bad
- Broccoli and cauliflower stems
- Stems of herbs and other vegetables, such as asparagus
What Not to Put In a Homemade Compost?
You should never add fish, meat scraps, dairy products, oily food, diseased plants, weeds, and plants sprayed with insecticides and pesticides. Conversely, other items involve:
- Waste material of dogs, cats, and other animals that feed on meat.
- Human feces.
- Metal and petroleum products.
- Hygiene and cosmetic products.
- Lotion, shampoo, conditioner, and body wash.
- Petrol and any lubricants.
- Charcoal ash.
- Treated sawdust and synthetic fertilizer.
- Chewing gum, glue, and tape.
- Weeds that produce seeds by asexual reproduction, like Japanese knotweed.
- Any shiny and coated paper, including labels and strikers on fruits and vegetables.
In addition to the above-mentioned items, you may also maintain the size of your homemade compost heap. Never make your compost pile too big or too small. Thus, the perfect size for the compost pile is from 3’ × 3’ × 3’ & 5’ × 5’ × 5’.
Popular Composting Methods that You Can Try at Home
The three traditional composting methods are hot, cold, and in-ground composting. However, the most recent methods of composting involve:
- Tumbler composting
- Vermicomposting
- Bacteria composting
- Compot composting
- Commercial composting
- Mechanical composting
All these traditional and modern composting are the most commonly applied ways you might use at home or for your business.
Most of them are similar; some work better when combined, and some are entirely different. Hence, it doesn’t matter which method you use at home; composting is best for your garden, plants, and environment.
How Do I Make Compost at Home? Best Tools for Composting at Home
The best tools for homemade composting are a compost bin, bucket, shovel, or pitchfork. Additional tools may include the following:
- Rake
- Garden hose or the watering can
- Regular gardening gloves
- Wheelbarrow
- Compost thermometer
- Compost tumbler
- Aerator or turner
- Compost sifters
- Hand Trowel or hand cultivator
If you already have these gardening tools, you just need to start the process. Conversely, if you don’t have these tools, you don’t need to buy them because you can easily make the perfect homemade compost without using them effortlessly.
In Summary
Don’t wait; start making a compost pile at home. Converting kitchen waste into a valuable soil amendment is a practical, cost-effective, and eco-friendly process. The benefits are enormous, whether you choose traditional or modern methods that meet your space and preferences.
It enhances soil health, supports plant growth, and conserves water. Just use the simple tools you already have and transform the green and brown materials into valuable black gold.
Remember, every effort counts, whether you have fancy equipment or not. All you need to take is the first initiative towards making your home, garden, and environment greener than before.